Some Common Use cases:
- Advanced Approval Processes: Orchestrate a multi-stage approval process involving different teams and decision criteria
- Task Lists for Groups: Assign tasks to multiple users in sequence or parallel. Add the Work Guide component to record pages so users know exactly what to do
- Order Fulfillment: Automate the order fulfillment process, including tasks like inventory checks, shipping updates, and customer communication
- Employee Onboarding: Consider employee onboarding that requires a new employee to go through a multi-level, multi-user, multi-system approval process to get equipment and access to digital company resources
- Service Delivery Orchestration: Multiple teams need to action various steps throughout a client delivery process in a specific order
Difference between Flow and Orchestration flow
| Feature | Flow | Orchestration |
|---|---|---|
| Purpose | Automates processes via data actions | Constructs complex business workflows |
| Record Centric | Yes | No |
| Object Dependency | Not tied to a specific object | Can involve multiple objects, users |
| Interface | Guides users through screens | Monitors operations, enhances efficiency |
| Tool | Uses Flow Builder (Point-and-click) | Employs Flow Orchestration |
Building Blocks of Flow Orchestration in Salesforce
1.Stages:
A stage groups related steps, organizing them into a logical phase. Stages are executed sequentially, and only one stage in an orchestration can be in progress at a time. You configure the conditions that must be met for the stage to be considered complete.
2. Steps:
Steps are grouped in stages and can be run sequentially or concurrently. There are three types of steps:
- Interactive steps: Assign the completion of an active screen flow to a person, group, or queue and require user intervention.
- Background steps: Run an active auto-launched flow synchronously or asynchronously and have no user interaction.
- MuleSoft steps: Run an action imported from a MuleSoft operation and have no user interaction.

3. Flow Orchestration Work Items:
When an interactive step in an orchestration runs, it creates a work item and assigns it to a user, group, or queue. The orchestration run then sends an email with a link to the specified record page to all assigned users. They complete the work in the Orchestrator Work Guide component on the specified record page.
4. Decision:
Evaluate a set of conditions, and then route users through the orchestration based on the outcomes of those conditions. This element performs the equivalent of an if-then statement.

In this blog, we will explore a practical use case for Salesforce’s powerful Orchestration Flow feature. We will create a multi-step, multi-stage scenario that automates the process of opening a new bank account for a customer and guiding them through their first transaction.
Steps to Follow
1. Create a Screen Flow: The first step is to create a Screen Flow. This flow will guide the customer through the process of creating a transaction. We will later incorporate this flow into our Orchestration Flow.
 2. Create an Autolaunched Flow: Next, we will create an Autolaunched Flow to send an email to the customer. This flow requires the customer’s email ID and a template for the email. For this example, we will create a simple template with the message: “Congratulations! Your new account has been created and your first transaction has been added.”

3. Create the Orchestration Flow:
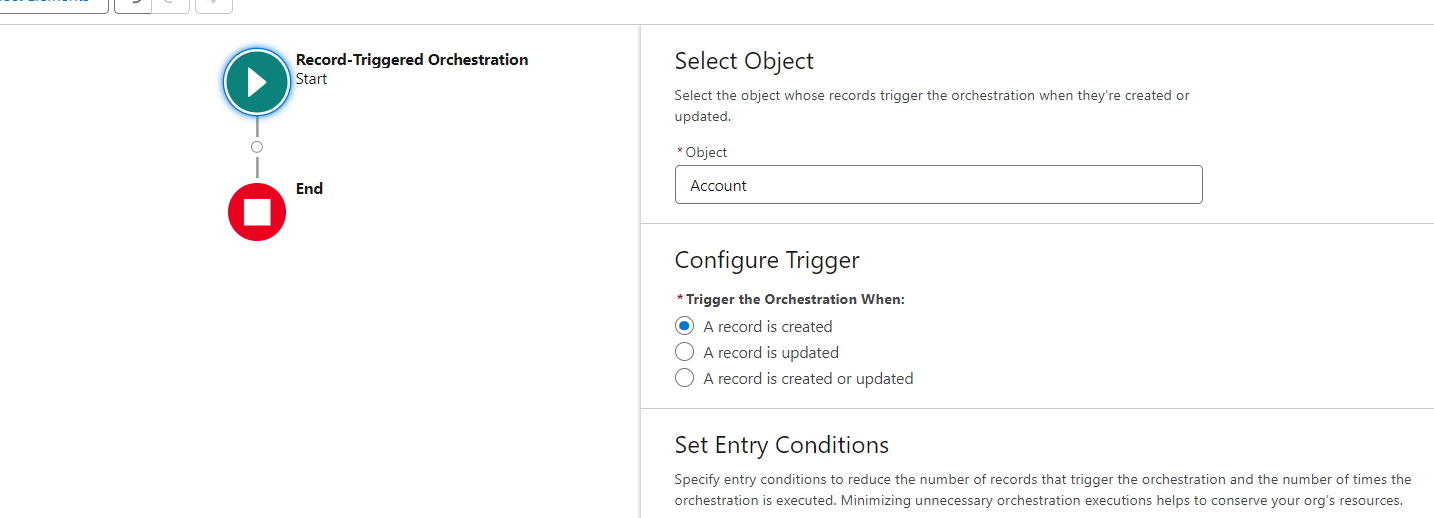
Now, we will create the Orchestration Flow. We need to define the trigger criteria for this flow. In this case, we will set the flow to run whenever a new bank account is created.
4. Add Steps to the Orchestration Flow:
The next step is to add steps to our Orchestration Flow. Each step corresponds to a stage in our process.
 5. Add Interactive Stage:
The first stage we will add is an Interactive Stage. This stage will use the Screen Flow we created in Step 1 to interact with the user. Make sure this flow is active before you proceed. In these steps, I am selecting the user who will perform the action, as well as the record on which the action will be performed.
 6. Add Automated Stage:
The second stage we will add is an Automated Stage. This stage will use the Autolaunched Flow we created in Step 2 to send an email to the customer.
 7. Activate the Flow and Add to the Record Page:
Once all stages are added, we can activate the flow and add the Orchestration Work Guide to the record page.

Test the Flow:
Finally, we can run a test to ensure that the flow is working as expected.
Here is a demo video that walks you through the entire process.
Conclusion
Salesforce’s Orchestration Flow is a powerful tool that allows us to create complex, multi-step, multi-stage scenarios. In this blog, we covered a simple scenario to demonstrate its capabilities. However, the possibilities are endless. You can create more complex scenarios based on your specific business needs,
Do not hesitate to reach out to us if you need help orchestrating Flow and for more blogs, Stay connected!
