In the rapidly evolving world of technology, the ability to integrate different systems and platforms is crucial. One such powerful integration is between Google Cloud Pub/Sub and Salesforce, two giants in their respective domains. When you  Integrate Google Cloud Pub/Sub With Salesforce, together they create a dynamic ecosystem that allows real-time updates and seamless data flow, enhancing business efficiency and customer experience. In this blog, we will delve into the step-by-step process of setting up this integration, enabling Salesforce to subscribe to messages published by third-party applications from Cloud Pub/Sub topics. Let’s begin!

Step-by-step Guide to Integrate Google Cloud Pub/Sub With Salesforce

1. Create an account in Google Cloud

  • If you are new to Google Cloud you will have to create an account in Google Cloud.
  • Open your browser and search for Google Cloud.
  • Click on Create Free Account. Then click on Get Started for free.
  • Now select your Gmail account and country and click on Agree & Continue.
  • Enter your debit or credit card details and click on Start Free.
  • It will debit only 2 rupees from your bank account.
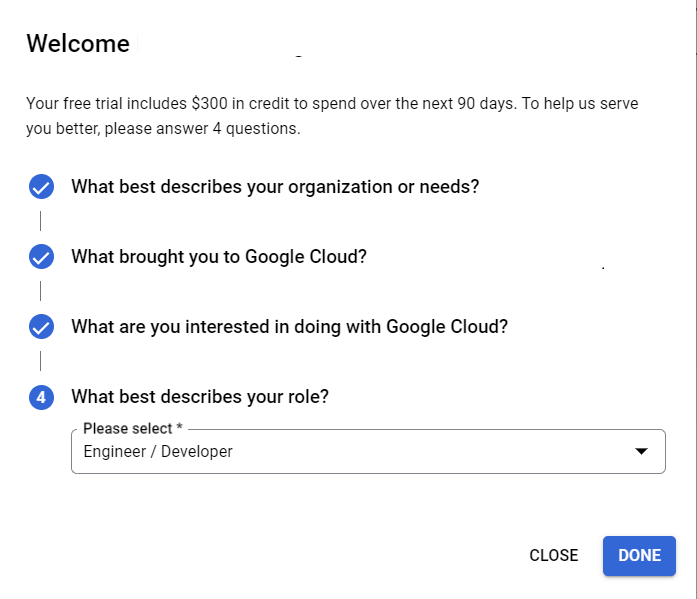
  • Once the Transaction process has been done you will see a new popup window with a Welcome message.
  • Answer all the questions and click on Done.

2. Create a Project in Google Cloud.

  • After creating an account you will be redirected to the home page.
  • At the top right corner, you will see it has created a project called My First Project.
  • If in your case it is not created, search for the project on the search bar and click on Create a project.
  • Enter the name of the project and click on Create.

3. Create a Topic in Google Cloud.

  • Now in the search bar, search for pub/sub. Then click on Pub/Sub.
Create Topic in Google Cloud
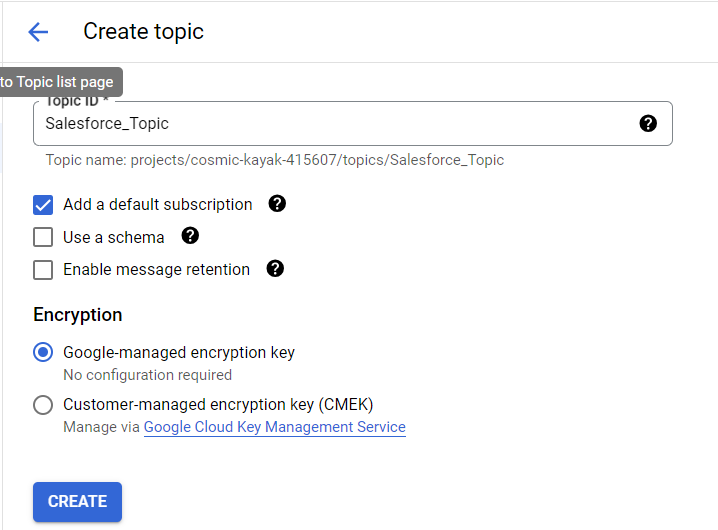
  • Now Click on Create Topic.
  • For Topic Id enter Salesforce_Topic. Click on Create.
Topic Id enter Salesforce Topic

4. Create Subscriptions for Topic.

  • Generally, when you create a Topic it automatically creates a subscription, if it is not created in your case, click on Subscriptions and click on Create Subscription.
Create Subscription
  • For Subscription Id enter Salesforce_Sub and for cloud pub/sub Topic select Salesforce_Topic.
  • For Delivery Type select Pull. Keep other details as it is. Click on Create.
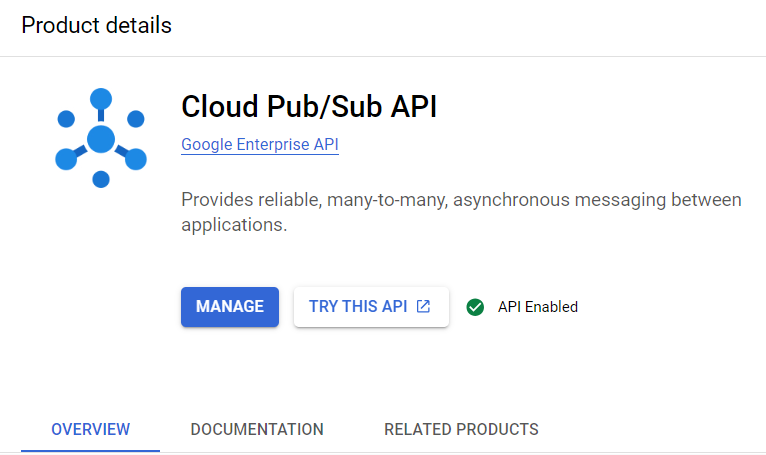
  • After creating a Subscription make sure pub/sub API is enabled.
  • Click on the left-side hamburger and navigate API & Services>Library.
  • In the search bar, search for Cloud Pub/Sub API. Click on it.
  • Now make sure it is enabled if not enable it.
Product Details

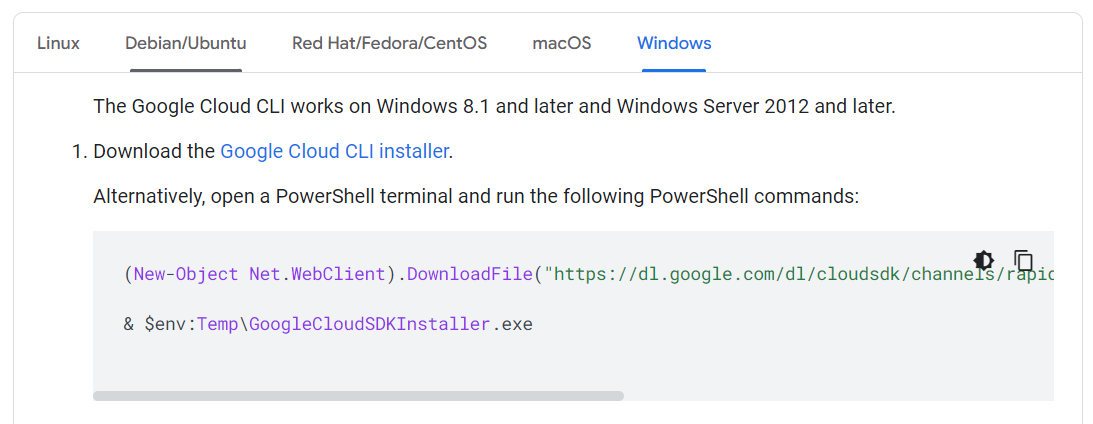
5. Download Google Cloud Cli and Authorize your account.

Google Cloud CLI installer
  • Open the downloaded installer and click on all users. And click on next.

  • Click on install. If GCloud CLI already exists it will update the existing one.

  • After successfully installing. Click on next, it will open the terminal. Answer these questions that appear on the screen.

  • Then it will ask for login. Now log in with your current Google Cloud account.

  • If it did ask for login open the terminal and run this command to authorize your current account with GCloud CLI: GCloud auth application-default login

  • Authorize your Google Cloud account.

6. Create a third-party demo website

Now create a demo contact page using HTML, CSS, and JS. The user will create contact data from the website and it will be published in Cloud Pub/Sub Salesforce_Topic that we created in the above steps.

Create an HTML file for the contact page.

  • Create a new folder C drive and open it in Vs Code.
  • Now click on Create a new file and for the name enter Publisher.html.
  • In this Page user adds Name, Email, Phone, Website, and Message.
  • Copy this code in the Publisher.html file.

Create a ThankYou .html page.

Now create a Thank you page which will redirect us to our salesforce site and there we will see our published data.

Copy this code on the new Thankyou.html file.

Create a Publisher.css file

  • Create new file in same folder and paste the below code on it

Upload a favicon.ico file on the sameCloud Pub_Sub directory.

  • Open your browser and search for the ico converter.
  • Open any link, upload any image, and convert it to .ico.
  • After downloading the favicon.ico image, upload it to the Cloud Pub sub directory.

Create app.js file

  • Now one of the most crucial parts of this component to create a new file called app.js.
  • Make sure your system has Node js installed If not first install Node js from the official site.
  • This app.js file is responsible for publishing the data in the Cloud pub_sub topic.
  • Copy this code and paste it into your app.js file.
  • Replace the Topic name with your pub/sub topic name.
  • To get the topic name go to the Google Cloud account and search for the topic.

To run this app, we also have to install some libraries used in this app.

  • Open VsCode Terminal and run this command to install express: npm install express
  • After installing express now install cors and run this command in Vs code terminal: npm install cors
  • Now Install Cloud Pub/Sub Libraries and run this command in Vs code Terminal: npm install @google-cloud/pubsub
  • Now run your application using this command in Vs Code Terminal: Node app.js

It will show the output: Server listening on port 3000. It means it is running perfectly.


7. Create Apex class and Lightning Web Component in Salesforce.

  • Open Vs Code and open your org.
  • Create a new Apex class.
  • Create a new Apex class with the name GoogleCloudPubSubService.

Now Paste the below code in class.

For Endpoint. add your subscription name after v1/

Endpoint
  • To get the token go to your Google Cloud account and click on Console.
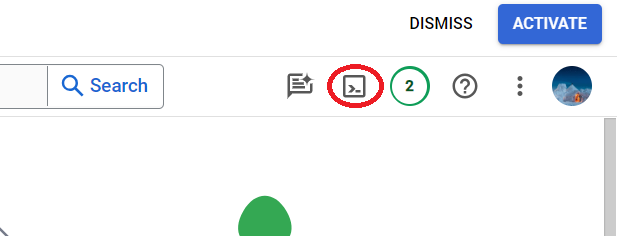
  • Now Click on the Cloud shell icon located right top corner.
  • Click on continue. After loading run this command to get the access token: GCloud auth print-access-token.
  • Click on Authorize and copy the generated access token.

(Please note: This access token will be valid only for 1 hour. You have to generate a new access token after 1 hour. You can generate a new access token using the same steps.)

After adding these values deploy the class to the source org.

  • Now Create a New Lightning Web Component. For name enter cloud_Pub_Sub.
  • After creating LWC now create the HTML file:
  • In the cloud_Pub_Sub.html file paste this code:
  • Create cloud_Pub_Sub.js file.
  • In the cloud_Pub_Sub.js file paste the below code

Create a cloud_Pub_sub.css file
In the cloud_Pub_sub.css paste the below code for styling.

  • Create cloud_Pub_sub.js-meta.xml file
  • In the cloud_Pub_sub.js-meta.xml file paste the below code.

After creating all files deploy all files to Salesforce.

8. Create a salesforce site.

  • From setup search for all sites. Click on new.
Create a salesforce site
  • Select any template I’m choosing Help Center. Click on Get Started.
Salesforce Help Center
  • For the name enter Cloud PubSub Data and in url again add CloudPubSubData**.**
  • Click on Create. After loading click on Builder.
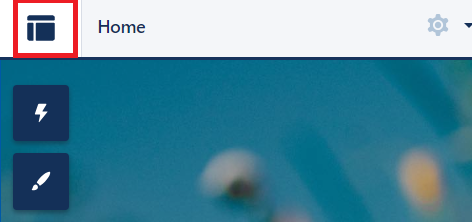
  • Now click on the Components icon located at the left top corner.
Components
  • Now search for the Cloud_Pub_Sub component. And crag it into the site page.
  • Now click on the settings icon left side and in the general section check the public access checkbox.
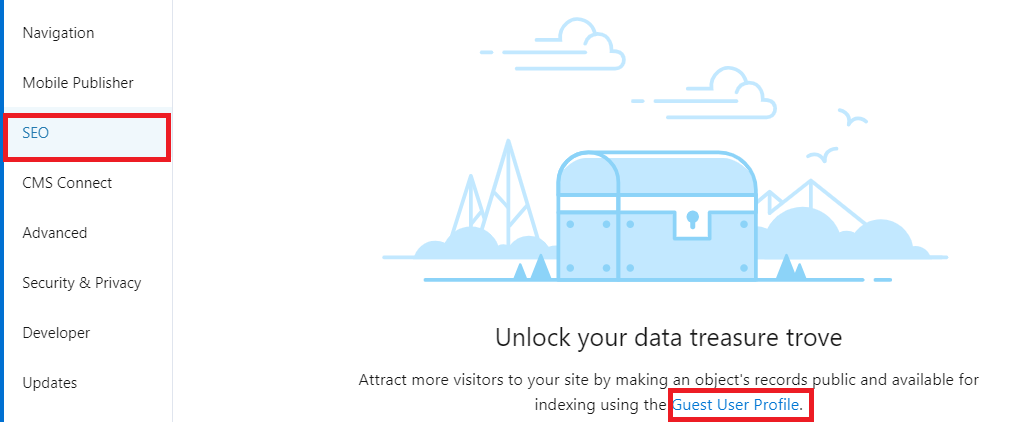
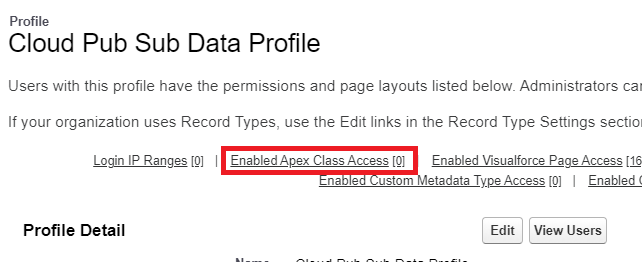
  • Then click on SEO and click on Guest User Profile.
Guest User Profile
  • Now click on Enabled Apex Classes Access. Click on edit.
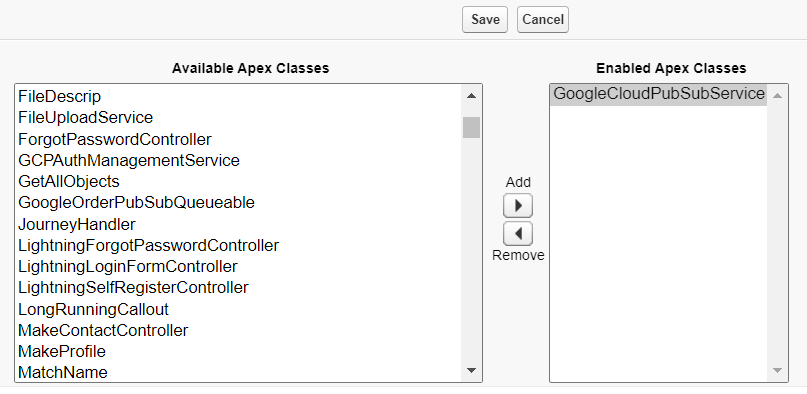
  • Search for GoogleCloudPubSubService in the Available Apex class Section and move it to the Enabled Apex Classes. Click on Save.
Enabled Apex Classes
  • Now click on the Builder icon and navigate to the Administration.
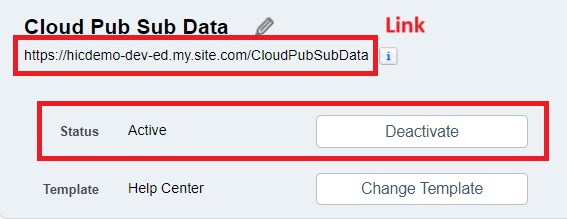
  • Now Click on Activate Button and activate your site.
  • Now Publish your Site.

Copy this link below Cloud Pub Sub Data.

Paste this copied link as the ThankuYou.html button’s href’s value.

9. Test our Pub/Sub integration.

Run your app.js application.

  • To run the app open the terminal in Vs code and close all terminals.
  • Now again open Terminal and run node app.js command.
  • It will return the Server listening on port 3000 messages as an output in the terminal.

10. Now click on your Publisher.html file

Click on your Publisher. Html file, Right click, and Open with Live server.

You will be redirected to the new window and it will open the contact page. 

Enter the data in a form and click the n Submit button.

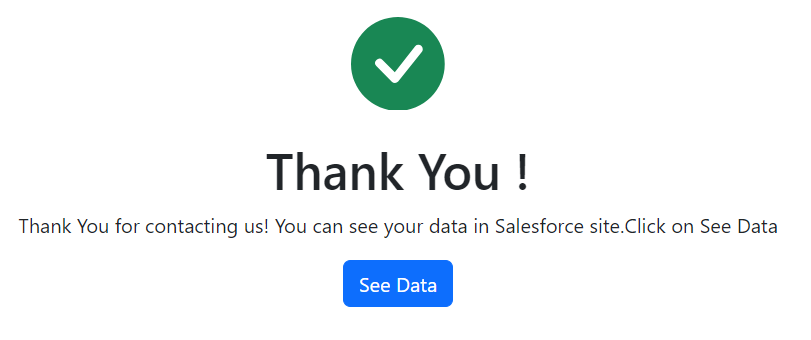
Once the message is published it will redirect you to the Thank You page.

Thank You page

11. See your data on the Salesforce site.

Once you are redirected to the Thank you page. Your data has been published in your Google Cloud topic.

You can verify it by going to the vs code and there you will find the published message id in the terminal.

Publish Massage
  • Now click on See Data button on the Thank You page.
  • Once you click on the See data button you will be redirected to the Salesforce site.
  • Now click on the View Data button of your site.
  • Now you will get your published data in your site.


Here is the Demo Video Link:

Click Here 


Conclusion​

The integration of Google Cloud Pub/Sub with Salesforce opens up a new realm of possibilities for real-time data exchange and processing. This integration allows Salesforce to subscribe to messages published by third-party applications from Cloud Pub/Sub topics, enhancing business efficiency and customer experience. The process to integrate Google Cloud Pub/Sub with Salesforce has been explained in detail in this step-by-step guide. It covers everything from creating an account in Google Cloud, setting up a project and topic in Google Cloud Pub/Sub, creating a third-party demo website, to creating an Apex class and Lightning Web Component in Salesforce.

So, Feel free to try out the solution and share your thoughts! And for such blogs, stay tuned!

Share This Blog
Related Articles

Salesforce CPQ (Configure, Price, Quote) is a powerful tool that enables businesses to streamline their quoting process by providing advanced configuration options. Among its many features, Multi-Dimensional Quoting (MDQ) stands out as a powerful capability that allows sales teams to create more detailed and flexible quotes for complex products. In this blog, we’ll dive into […]

Read More
Dynamic Search Filters in Salesforce CPQ

Salesforce CPQ (Configure, Price, Quote) is a powerful tool that allows sales teams to generate quotes with speed and accuracy. One of the key features that makes CPQ so flexible is its dynamic search filter capability. In this blog, we’ll explore how you can create dynamic search filters in Salesforce CPQ to make your quoting […]

Read More
How to Create Quote Templates Customization Methods

The objective after completing a quote is usually to produce a precise and expert quote document for clients. However, without the proper procedures in place, quoting can be difficult, error-prone, and time-consuming. Salesforce CPQ (Configure, Price, Quote) streamlines the process and improves quote accuracy by assisting with the setup and administration of quotation papers. By […]

Read More
Boost Performance with a Robust Trigger Framework in Salesforce

Boost Performance with a Robust Trigger Framework in Salesforce If you want to make sure of scalability and performance in the Salesforce development, managing Apex triggers is a must. With a trigger framework, you get a structured approach to organizing and maintaining trigger logic. This way, developers can follow the best practices while maintaining the […]

Read More

When it comes to Salesforce development, efficiently managing and deploying metadata is important to maintain streamlined operations. With the help of Unlocked Package, you can easily achieve this. It is specially designed for business’s internal use and allows businesses to develop and manage modular applications. This blog will walk you through the importance of Unlocked […]

Read More
How Salesforce Data Cloud Streamlines Data Management

The Data Cloud integrates your company’s data onto Salesforce’s Einstein 1 Platform. It provides each team with a comprehensive customer view for a better experience. The Data Cloud consolidates disparate data sources into a unified model, facilitating easy access and comprehension. It encompasses various data types such as web engagement and more from both internal […]

Read More
Our Location worldwide
Indian Flag India
3rd Floor, A-10, Pegasus Tower, Sector 68, Noida, Uttar Pradesh 201301 +91-1203117884
United States of America Flag USA
333 West Brown Deer Road Unit G – 366 Milwaukee WI, USA 53217 +1(262) 310-7818
United Kingdom Flag UK
7 Bell Yard, London, WC2A 2JR +44 20 3239 9428
Canada Canada
HIC Global Solutions INC
43 Lafferty Lane, Richmond Hill, L4C 3N8, CA +1(262) 310-7818